Live translated captions in ProPresenter
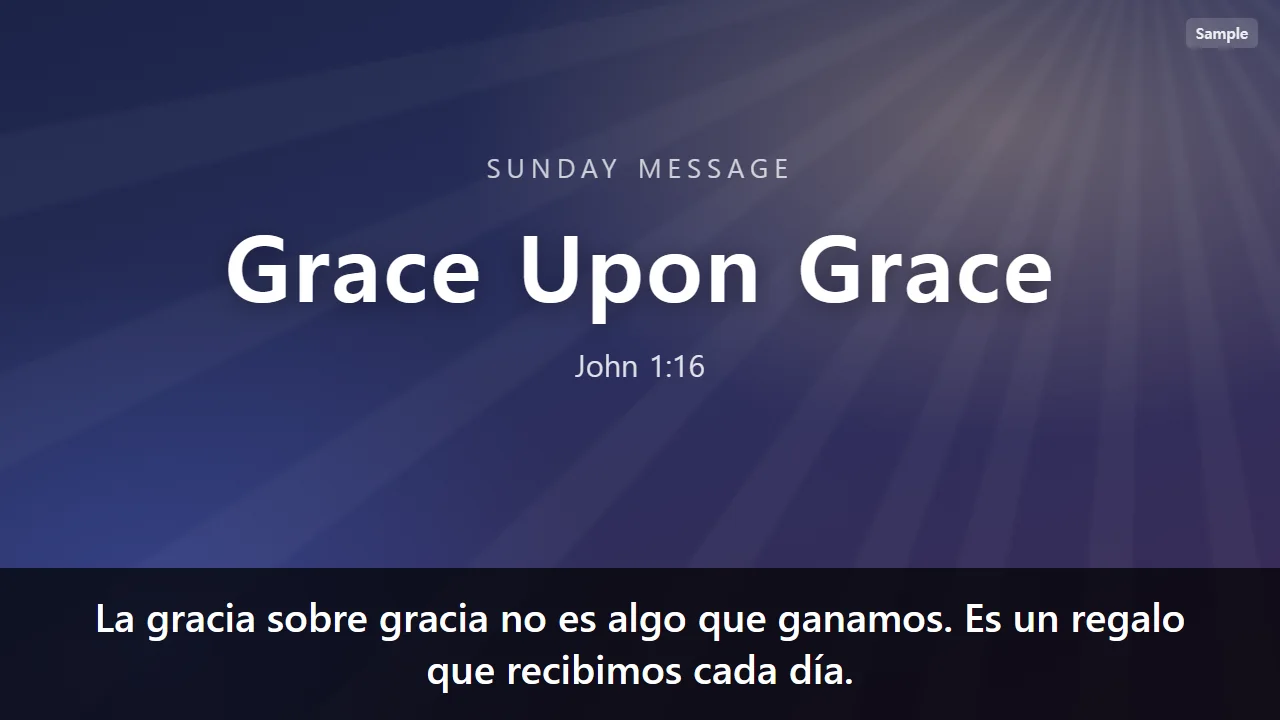
If your sanctuary screens run on ProPresenter 7, LiveTransVoice can write the translated sermon straight into a ProPresenter Message. You style it in ProPresenter the way you always do.
How it works
Create a Message called Translation in ProPresenter; LiveTransVoice keeps filling its token with the translated sentences. There are two connection modes:
| Connection mode | For |
|---|---|
| REST API (recommended, 7.9+) | ProPresenter 7.9 and later. One port from the Network preferences; simplest setup. |
| TCP/IP Messages (legacy) | Versions below 7.9, or existing setups. |
ProPresenter picks a random port on first launch, so it differs on every PC. Always check the port shown in your own ProPresenter.
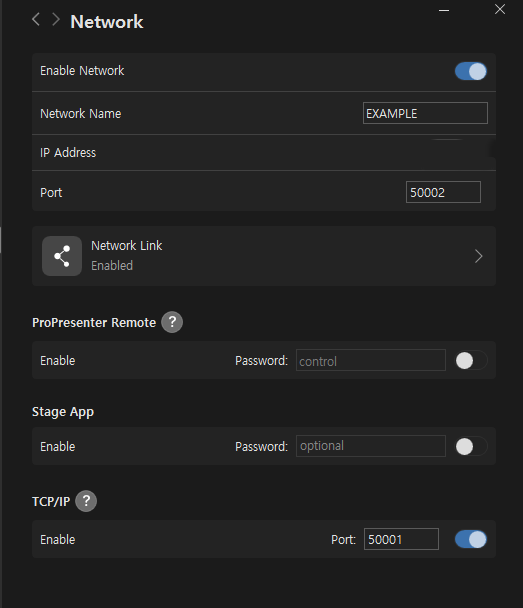
1. Turn on ProPresenter networking
- Open ProPresenter 7 → Preferences → Network.
- Turn on Enable Network at the top. Any Network Name is fine.
- Note the Port number. Setting a fixed, easy-to-remember port helps.
- If LiveTransVoice runs on a different PC, note the IP Address too.
2. Create the Translation message
- Open the Messages tab. If it is empty, click + Add Message in the middle; otherwise use the + at the top right.
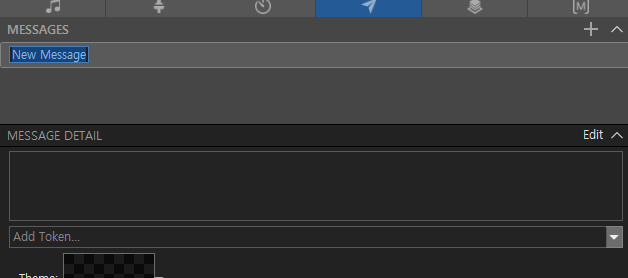
Messages tab — + Add Message - Rename the new message to exactly
Translation.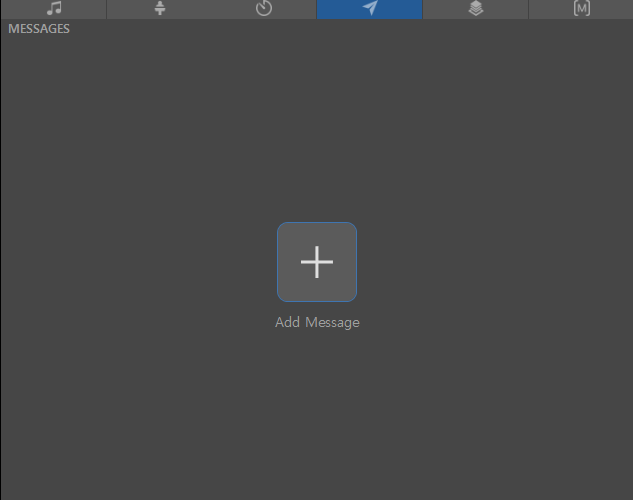
Replace “New Message” with Translation and press Enter - In MESSAGE DETAIL, open Add Token... and choose Message.
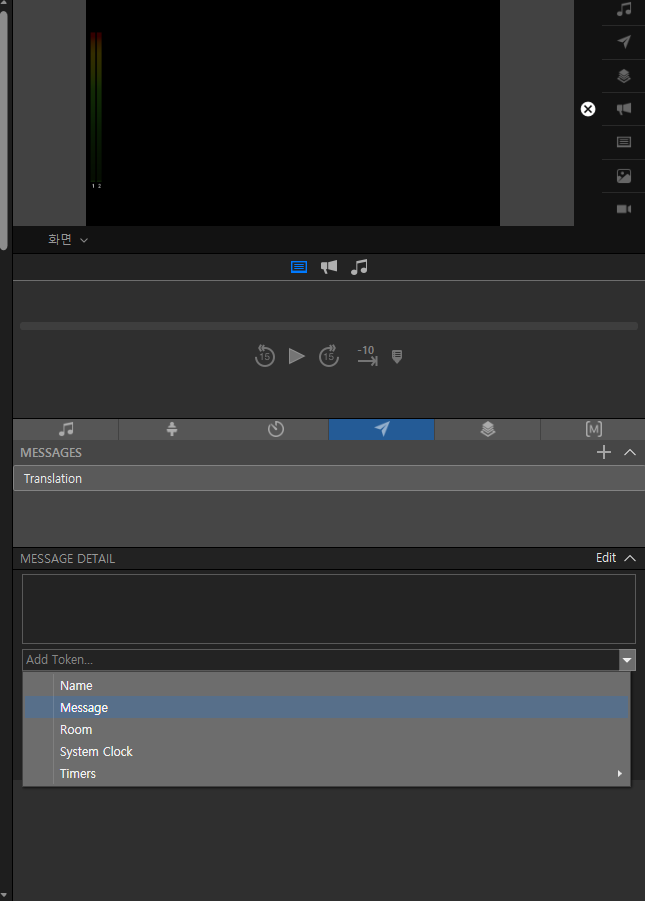
Add Token → Message - Style the theme (font, colour, position) the way the congregation should see it, and save.
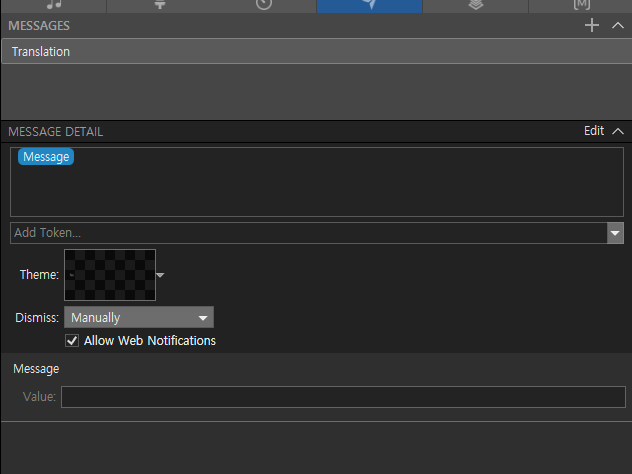
Done: Translation message on the left, Message token in MESSAGE DETAIL
3. Connect LiveTransVoice
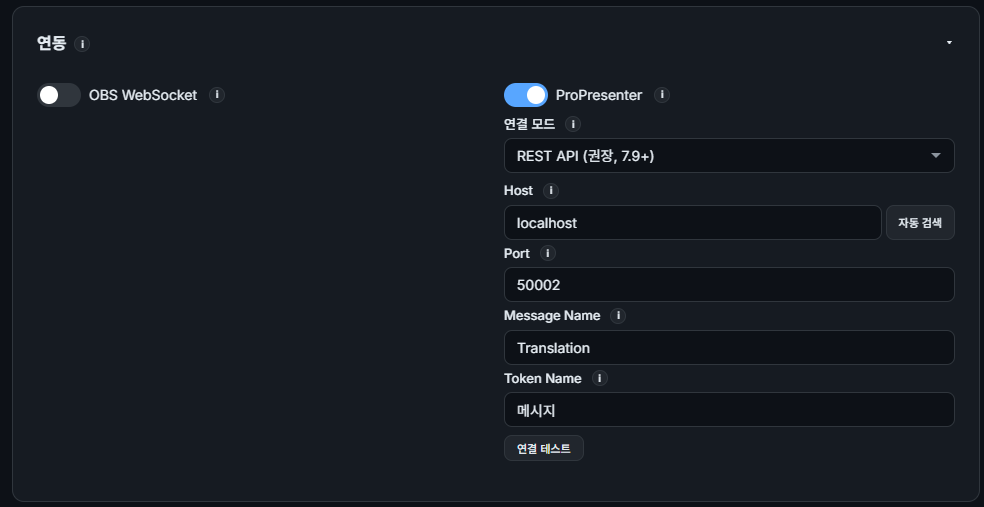
- Turn on Settings → Integrations → ProPresenter.
- Connection mode: REST API (recommended, 7.9+).
- Host:
localhoston the same PC, otherwise the ProPresenter PC's IP. You can also use auto-discover. - Port: the number from step 1.
- Message Name:
Translation, exactly as in step 2. - Token Name: exactly the token name you added in step 2 (
Messagein English ProPresenter). - Click “Test Connection”, wait for the success message, and save.
With several languages
When you interpret into several languages, all languages switched to “Screen” go into the one Translation message together. We suggest showing one or two on the screens and setting the rest to “Listen only” on the Multi-Language page, so they go to phones only.
If it does not connect
- If “Test Connection” fails, first check that the port matches ProPresenter's Network preferences.
- On two PCs, make sure both are on the same network and Windows Firewall is not blocking ProPresenter.
- Message Name and Token Name must match exactly, including capital letters.
- For ProPresenter below 7.9, switch the connection mode to TCP/IP Messages (legacy), enable TCP/IP in ProPresenter's Network preferences and use that port.
Common questions
Does it work with ProPresenter 6?
The integration is built for ProPresenter 7: REST API for 7.9 and later, TCP/IP mode for earlier 7.x versions.
Where do I change how the caption looks?
In the theme of the Translation message in ProPresenter. LiveTransVoice only fills in the text.
Can I use ProPresenter and OBS at the same time?
Yes. Both can be turned on under Integrations, alongside a phone listening room.
Try it this Sunday
Install it on a Windows PC and request a license to begin. Listeners do not need to install anything.
Request a license · Download