Live translated subtitles for your OBS and YouTube service
If you stream your service to YouTube with OBS Studio, you can lay live translated subtitles of the sermon right over the broadcast. Viewers abroad see them in the stream without changing any settings.
Before you start
LiveTransVoice composites the subtitles into the OBS picture, so they show up on YouTube or any other platform OBS streams to. Because they are drawn into the video, viewers cannot switch them with YouTube's CC button.
To add per-language CC subtitles to the replay afterwards, see the sermon subtitle files (SRT/VTT) guide.
| Method | Best when |
|---|---|
| A. Browser source | You want a simple setup. Font, colour, outline, background and number of lines are set in LiveTransVoice's Caption Studio with a live preview. |
| B. WebSocket text source | You want the translation inside an OBS text source and style it entirely in OBS. |
Method A — Browser source
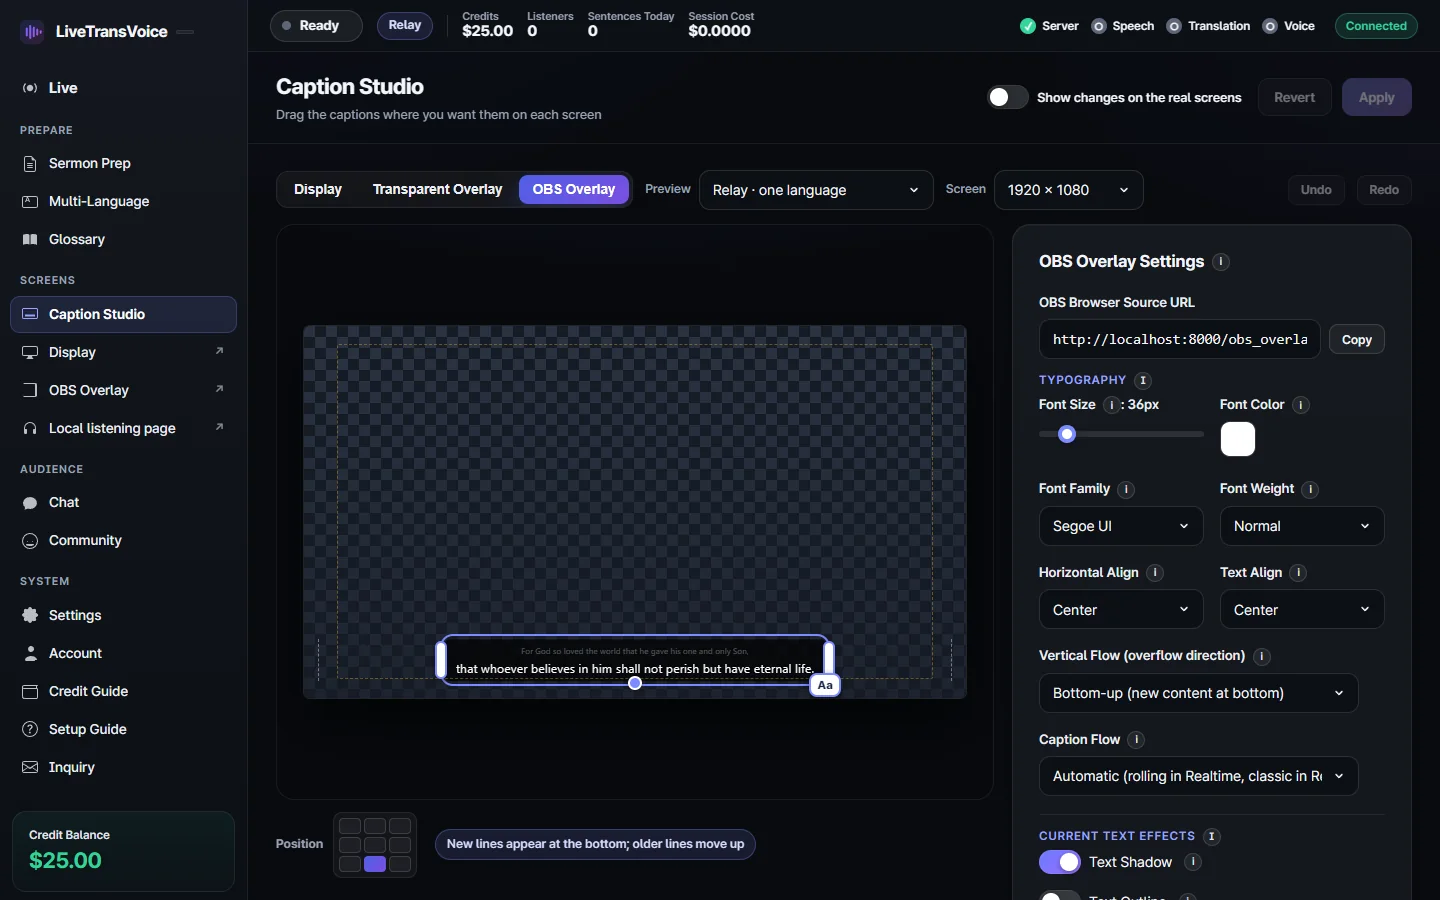
- In LiveTransVoice, open Caption Studio → OBS Overlay and copy the OBS browser source address. (Or use Live → Outputs → OBS Overlay → Copy address.)
- In OBS, click + under Sources and choose Browser.
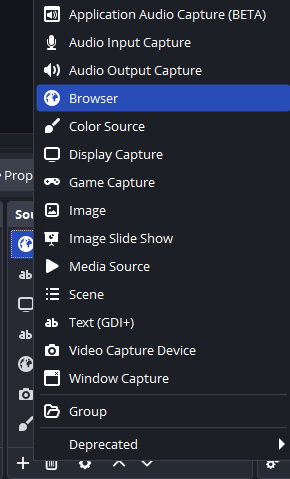
OBS Sources → + → Browser - Untick “Local file”, paste the address into URL, and set Width/Height to your stream resolution (e.g. 1920×1080).
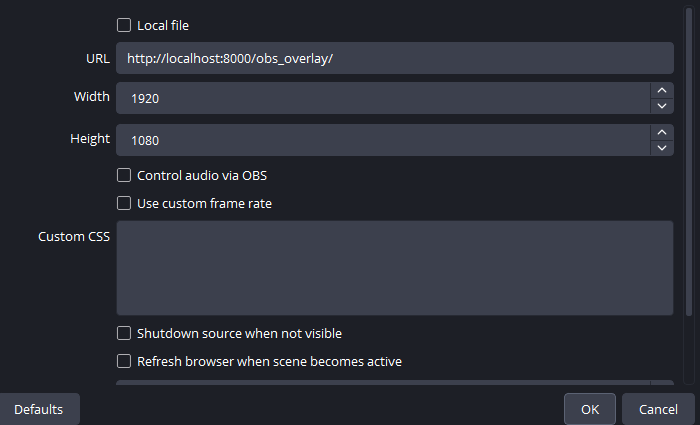
Paste the address; width and height match your stream - Click OK. When interpretation starts, translated subtitles appear in the stream.
The address is usually http://localhost:8000/obs_overlay/, but the number changes if another program already uses port 8000. Always copy the address the app shows. It is meant for OBS running on the same PC as LiveTransVoice.
Styling the subtitles (Caption Studio)
In Caption Studio → OBS Overlay, adjust while watching the preview, then click “Apply to OBS Overlay”.
- Font size, font colour, font family (you can upload your own font file), weight
- Outline, shadow, background colour and opacity
- “Caption Flow”: rolling (new words continue on one line and older lines move away) or classic (current sentence plus previous text)
- Number of lines (1–6), position and edge margins
- Set the page background to transparent (for OBS) so only the text sits on the video
Method B — WebSocket text source
- In OBS open Tools → WebSocket Server Settings.
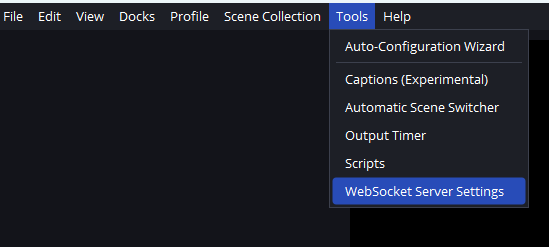
OBS menu: Tools → WebSocket Server Settings - Tick Enable WebSocket server and keep the default port
4455. For a password, enable authentication and read it from Show Connect Info.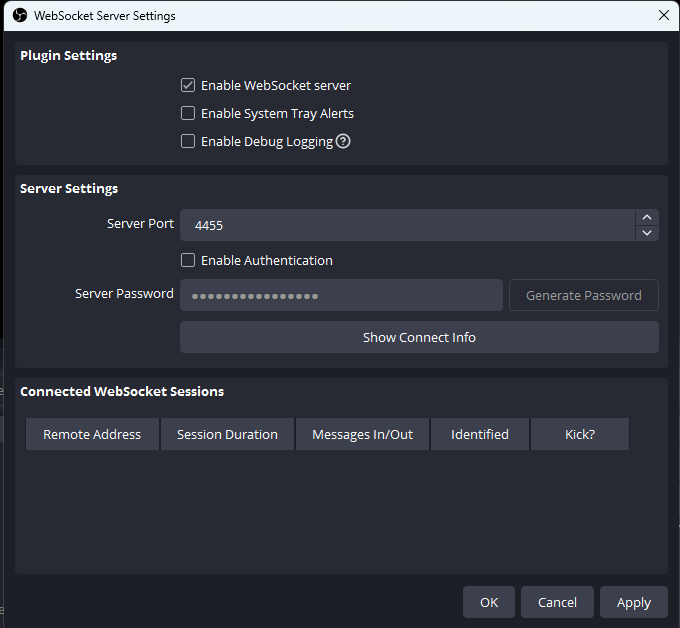
Enable WebSocket server, port 4455 - Add a Text (GDI+) source and name it exactly
Translation Text(case-sensitive).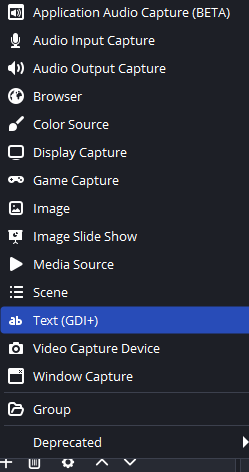
Add a Text (GDI+) source 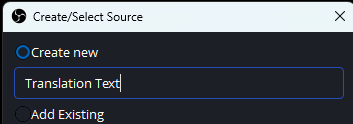
Source name: Translation Text - In LiveTransVoice, turn on Settings → Integrations → OBS WebSocket and enter Host (
localhoston the same PC), Port (4455), the password if you set one, and Text Source (Translation Text).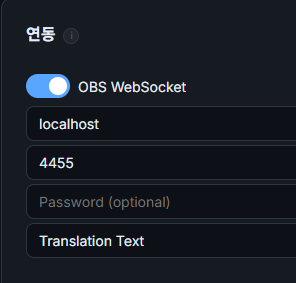
LiveTransVoice Settings → Integrations → OBS WebSocket (Korean UI shown) - Back in OBS, the connection should appear under “Connected WebSocket Sessions” with a ✓ under Identified.
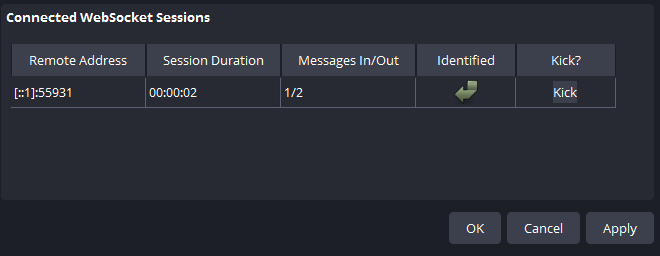
A connected session means it worked
With several languages, Translation Text receives the on-screen languages together. If you also create text sources named Translation EN, Translation ES and so on, each receives just that language.
Working with several languages
On the Multi-Language page each language has its own “Screen” and “Listen” switch. Show one or two languages on the stream and set the rest to Listen only: they still go to phones and the archive while your broadcast stays clean.
Subtitles without OBS
Without OBS, the Transparent Overlay puts a subtitle window on top of your desktop, handy over PowerPoint or other programs.
Common questions
Are the live subtitles sent to YouTube as a CC track?
No. Live subtitles are composited into the OBS picture. For the replay, upload the SRT files created after the service to add per-language CC subtitles.
Can OBS run on a different PC?
With the WebSocket method, enter the OBS PC's local IP as Host. The browser source address refers to the PC running LiveTransVoice, so the same PC is simplest.
Can we match our church's fonts?
Yes. Upload a font file in Caption Studio and set colour, outline, shadow and background. With the WebSocket method, you style the OBS text source itself.
Try it this Sunday
Install it on a Windows PC and request a license to begin. Listeners do not need to install anything.
Request a license · Download